vue項目中怎么做圖片裁剪?下面本篇文章給大家介紹一下怎么使用vue-cropper做圖片裁剪,希望給大家有所幫助!

由于項目需要,需要做圖片裁剪。之前的項目已經由cropper.js實現過,因為這次使用的是vue,所以采用了vue-cropper這個組件,使用起來很簡單,但是坑也很多。
一、安裝
npm install vue-cropper
main.js
import VueCropper from 'vue-cropper'
Vue.use(VueCropper)
二、圖片裁剪

1、引入VueCropper組件,并設置相關的屬性。
<div  style="display: flex;justify-content: center;align-items: center;width: 100%;height: 100%;">
            <vueCropper
              @mouseenter.native="enter"
              @mouseleave.native="leave"
              ref="cropper"
              :img="uploadImg"
              :outputSize="option.size"
              :outputType="option.outputType"
              :info="true"
              :full="option.full"
              :canMove="option.canMove"
              :canMoveBox="option.canMoveBox"
              :original="option.original"
              :autoCrop="option.autoCrop"
              :fixed="option.fixed"
              :fixedNumber="option.fixedNumber"
              :centerBox="option.centerBox"
              :infoTrue="option.infoTrue"
              :fixedBox="option.fixedBox"
              style="background-image:none"
            ></vueCropper>
</div>
option: {
    info: true, // 裁剪框的大小信息
    outputSize: 0.8, // 裁剪生成圖片的質量
    outputType: "jpeg", // 裁剪生成圖片的格式
    canScale: false, // 圖片是否允許滾輪縮放
    autoCrop: false, // 是否默認生成截圖框
    fixedBox: false, // 固定截圖框大小 不允許改變
    fixed: false, // 是否開啟截圖框寬高固定比例
    fixedNumber: [7, 5], // 截圖框的寬高比例
    full: true, // 是否輸出原圖比例的截圖
    canMove: false, //時候可以移動原圖
    canMoveBox: true, // 截圖框能否拖動
    original: false, // 上傳圖片按照原始比例渲染
    centerBox: false, // 截圖框是否被限制在圖片里面
    infoTrue: true // true 為展示真實輸出圖片寬高 false 展示看到的截圖框寬高
}??默認的裁剪圖片的背景帶有賊丑的馬賽克,其實是它用了一張馬賽克的圖片做背景,去掉只需在VueCropper上設置去除背景圖片的樣式style="background-image:none".
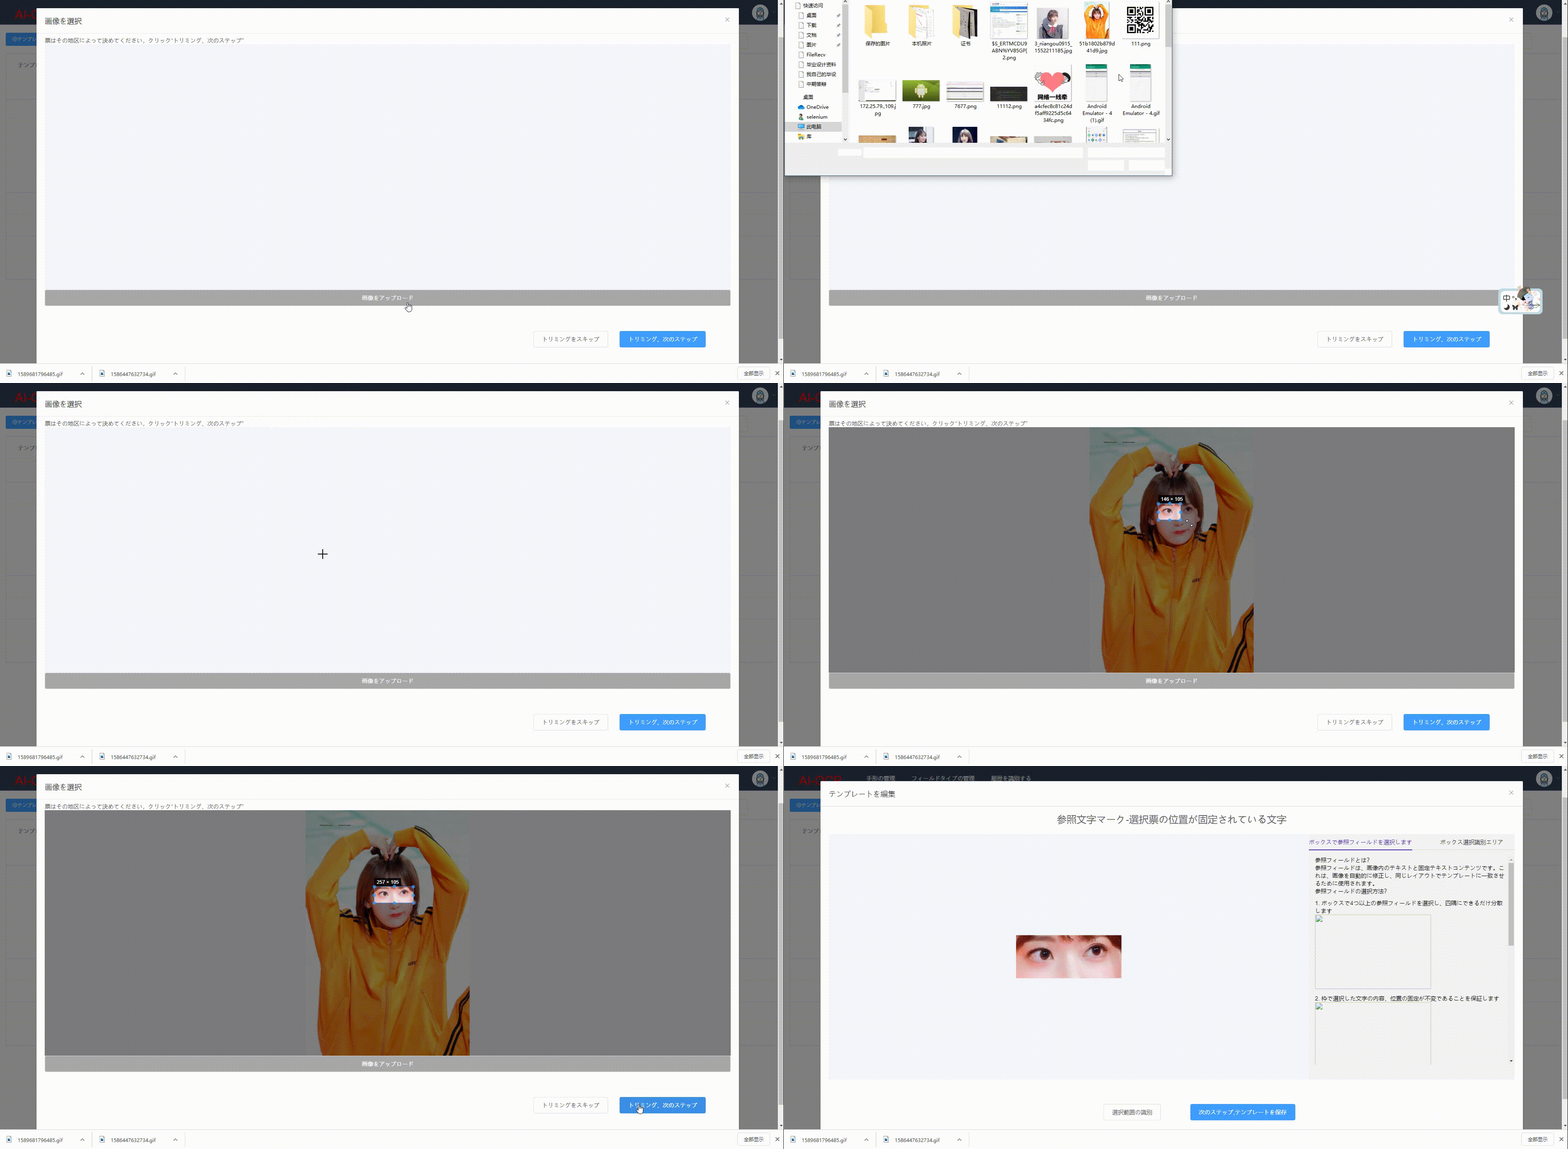
2、上傳完成后鼠標進入VueCropper即可以開始裁剪
在VueCroper上設置@mouseenter.native="enter"事件(??組件上使用原生事件需要加上native關鍵字)
enter() {
 if (this.uploadImg == "") {
   return;
 }
 this.$refs.cropper.startCrop(); //開始裁剪
},
3、離開VueCropper即停止裁剪,得到裁剪圖片。
在VueCroper上設置@mouseleave.native="leave"事件
leave() {
   this.$refs.cropper.stopCrop();//停止裁剪
   this.$refs.cropper.getCropData(data => { //獲取截圖的base64格式數據
     this.cutImg = data;
   });
   // this.$refs.cropper.getCropBlob(data => { //獲取截圖的Blob格式數據
   //   this.cutImg = data;
   // });
},
我這里是離開p就會裁剪,點擊裁剪按鈕后傳遞裁剪圖片,而不是點擊裁剪按鈕才裁剪,因為我點擊裁剪按鈕裁剪的話,拿到的圖片并沒有裁剪過,我也不知道為什么,就想出了這個辦法。
vue-cropper圖片裁剪問題
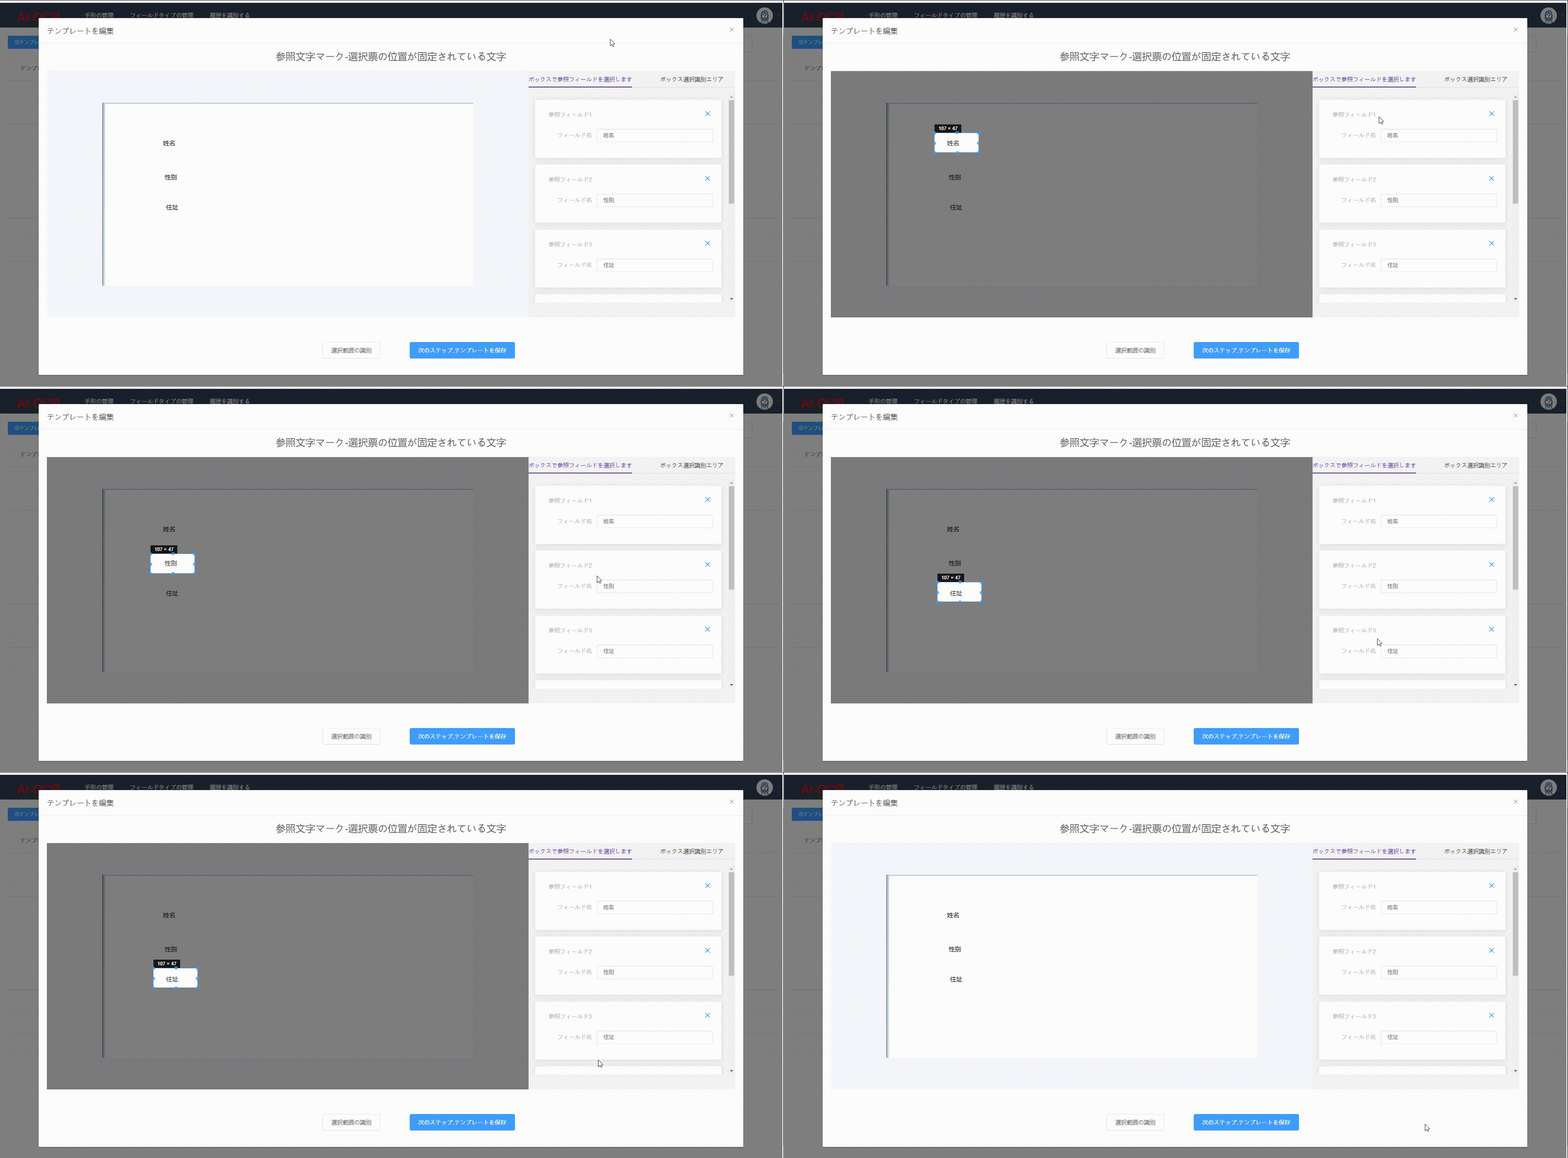
三、將截圖框回顯到原圖上

基本原理:
this.$refs.cropper.getCropAxis() //獲取截圖框基于容器的坐標點 {x1: 174, x2: 131, y1: 86, y2: 58}
this.$refs.cropper.cropW  //截圖框寬
this.$refs.cropper.cropH //截圖框高
通過上面的方式獲取截圖框的寬、高和基于容器的坐標點,然后讓VueCropper的自動截取框顯示出來并設置自動截取框的大小和位置。
以姓名字段為例:
{
    id: 1,
    name: "姓名",
    cropInfo: {
        width: 108, //this.$refs.cropper.cropW
        height: 56, //this.$refs.cropper.cropH
        offsetX: 174, //this.$refs.cropper.getCropAxis().x1
        offsetY: 86  //this.$refs.cropper.getCropAxis().y1
    }
}1、在"姓名"el-card上設置enter事件<el-card @mouseenter.native="enterCard(refWord)" />
enterCard(refWord) {
  this.$refs.cropper.goAutoCrop();//重新生成自動裁剪框
  this.$nextTick(() => {
    // if cropped and has position message, update crop box
    //設置自動裁剪框的寬高和位置
    this.$refs.cropper.cropOffsertX = refWord.cropInfo.offsetX;
    this.$refs.cropper.cropOffsertY = refWord.cropInfo.offsetY;
    this.$refs.cropper.cropW = refWord.cropInfo.width;
    this.$refs.cropper.cropH = refWord.cropInfo.height;
  });
}2、在所有el-card外層的el-tabs上設置leave事件<el-tabs @mouseleave.native="leaveCard()" />
leaveCard() {
  this.$refs.cropper.clearCrop(); //取消裁剪框
}
??注意不要在el-card上設置leave事件,不然進行鼠標移動到下一個el-card的時候會取消裁剪框又重新生成,導致頁面出現閃爍的現象。
四、其它
將截圖框限制在圖片內:https://github.com/xyxiao001/vue-cropper/issues/429
解決方案:centerBox設置為true,并且只有autoCrop=true時才會生效
項目需要將裁剪框框出的位置信息和裁剪框大小給后臺,讓后臺裁剪或者進行OCR,但是傳給后臺后裁剪出來的圖片總是向右下角偏移:https://github.com/xyxiao001/vue-cropper/issues/386
解決方案:圖片是縮放過的,傳遞position時,需要將position*scale.
裁剪大部分圖片沒有問題,但是裁剪某些圖片時總是有偏差:https://github.com/xyxiao001/vue-cropper/issues/439
解決方法: 原來默認的裁剪圖片大小有限制,寬高最高為2000px,將這個值設置為了10000,問題解決.


